Tower Light Generator
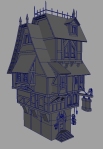
With the hand painted warhammer house being called done, I’m switching gears to current gen stuff. I’m probably going to be doing some environments in the coming months, but before I start on those I’m going to make a small asset to iron out any wrinkles that I have when it comes to baking normals.
Below is my current progress. I had to bake two different normal maps in Maya and combined them in order to get good results in the viewport. One was baked using geometry normals and the other surface normals (you can find the option at the very bottom of the transfer maps window). Geometry normals gets you smoother edges while distorting the bake on the surface of a face while Surface normals does the opposite (you have to of course make sure the normals and UVs on the low poly are set properly though) . By combining the two maps, you get the best of both worlds. I’ve tossed a test obj using this method into UDK and the normals seem to look fine. Fingers crossed when I throw this asset in. *Yawn*

Oh I also got the chance to model my first high poly tire, something that I’ve kept pushing back. The effort was definitely worth it.


